Add (multifunctional) printer manually
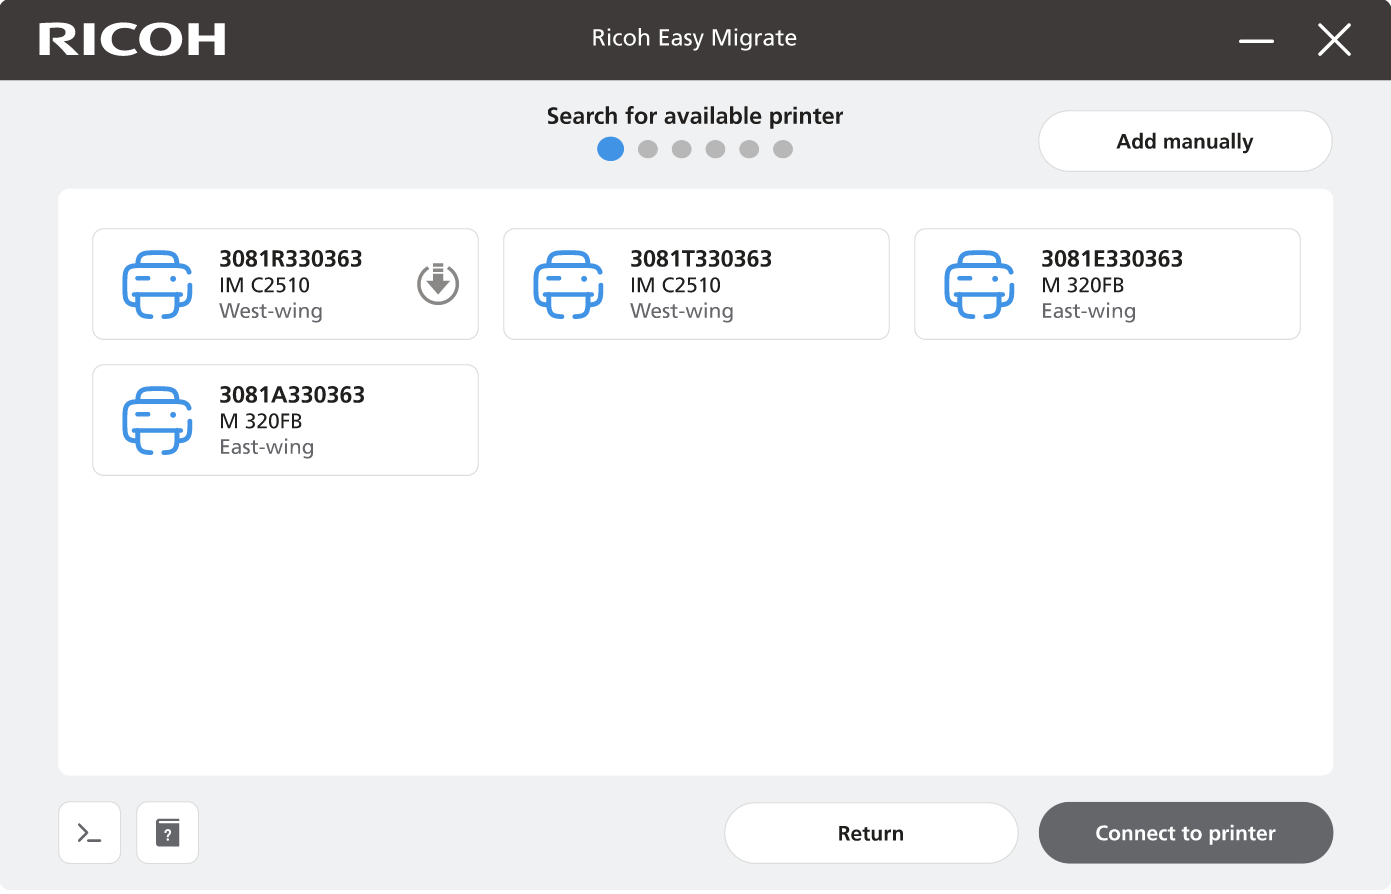
If the correct (multifunctional) printer is NOT found, you have the option to add the (multifunctional) printer manually. This can be done by clicking the “Add manually” button when the RICOH Easy Migrate tool is done searching.

Found (multifunctional) printer screen
Multifunctional printer details
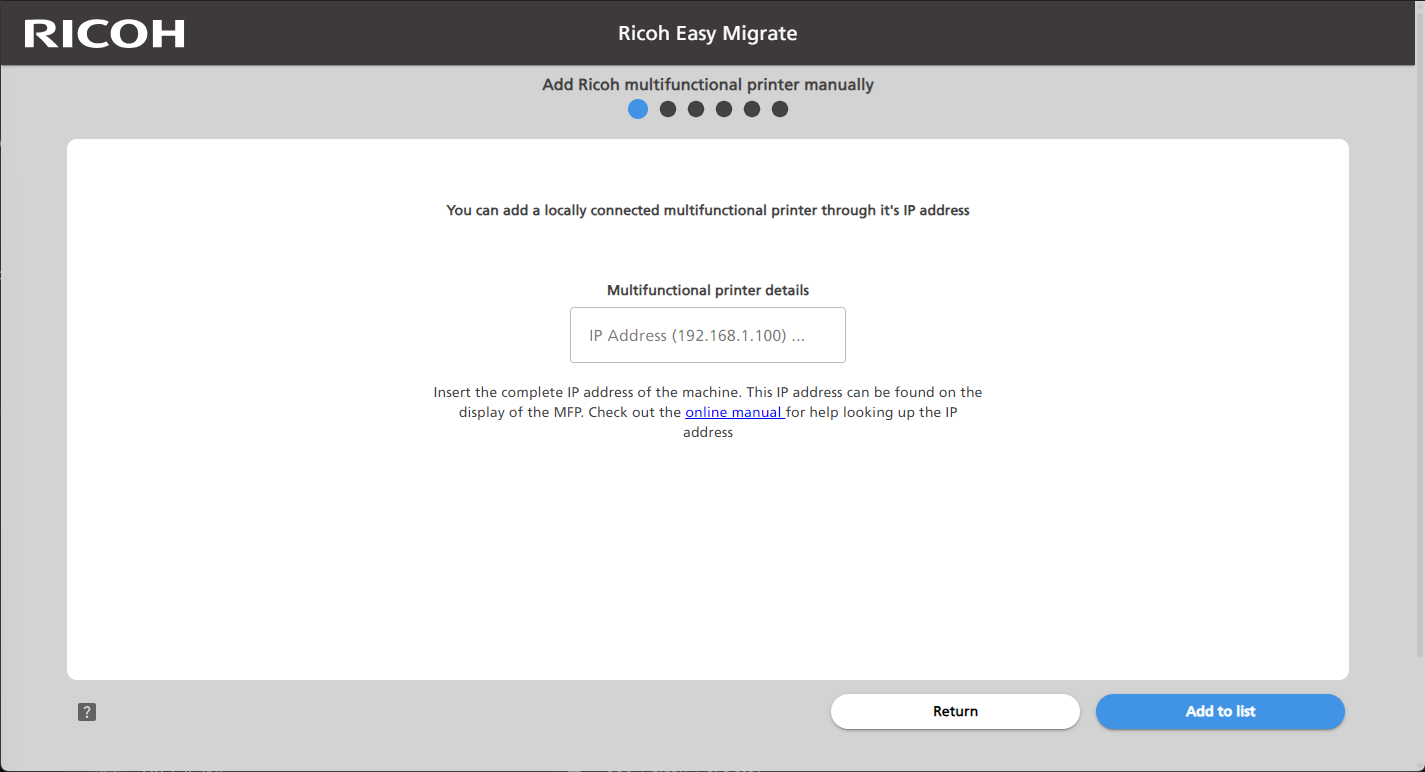
In the following screen, the Ricoh Easy Migrate tool will ask you to provide the IP address of the (multifunctional) printer. Follow the steps below the screenshot to find the IP address of the (multifunctional) printer.

Add Ricoh (multifunctional) printer manually screen
Where to find the IP address of the (multifunctional) printer?
Physically locate the (multifunctional) printer you would like to connect to.
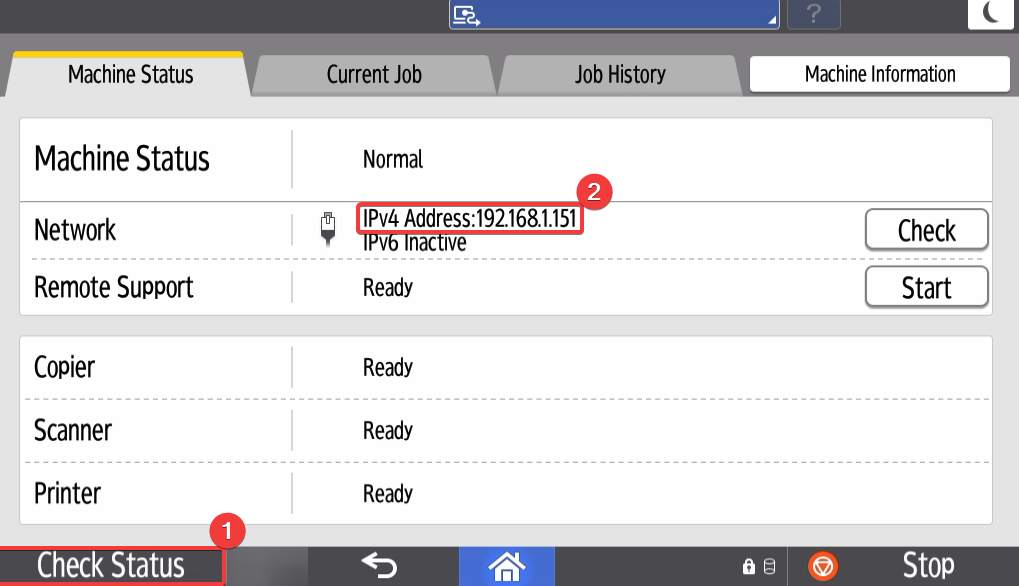
Click on “Check Status” botton in the bottom left corner of the screen
Note the value next to “IPv4 Address:“. In this example: “192.188.1.151”.
If no network option can be found here, please follow this online guide to print the network settings list. Note the value next to “IPv4 Address”.

Check Status screen
Next steps
Enter the value you noted in the “IP Address (192.168.1.100) …” field and click the “Add to list” button. If the RICOH Easy Migrate tool can connect to the (multifunctional) printer with the provided IP Address, the “Step 1: Search for available (multifunctional) printer” screen will be shown. Return to the part you came from for further guides:
